


How to Measure Windows for Custom Shades: Your 9-Step Guide for Jackson, TN Homes
Quick answer: To measure windows accurately for custom shades in Jackson, TN, you need a steel tape measure, a notepad, and a clear understanding of whether you want an inside-mount or outside-mount installation. For inside mounts, measure the exact width and height of the window opening at three points each and record the smallest dimension. For outside mounts, add 3–4 inches to each side for light control and coverage. Always double-check every measurement before ordering — custom shades are cut to your exact specs and cannot be returned once made.
Why Accurate Window Measurements Matter More Than You Think
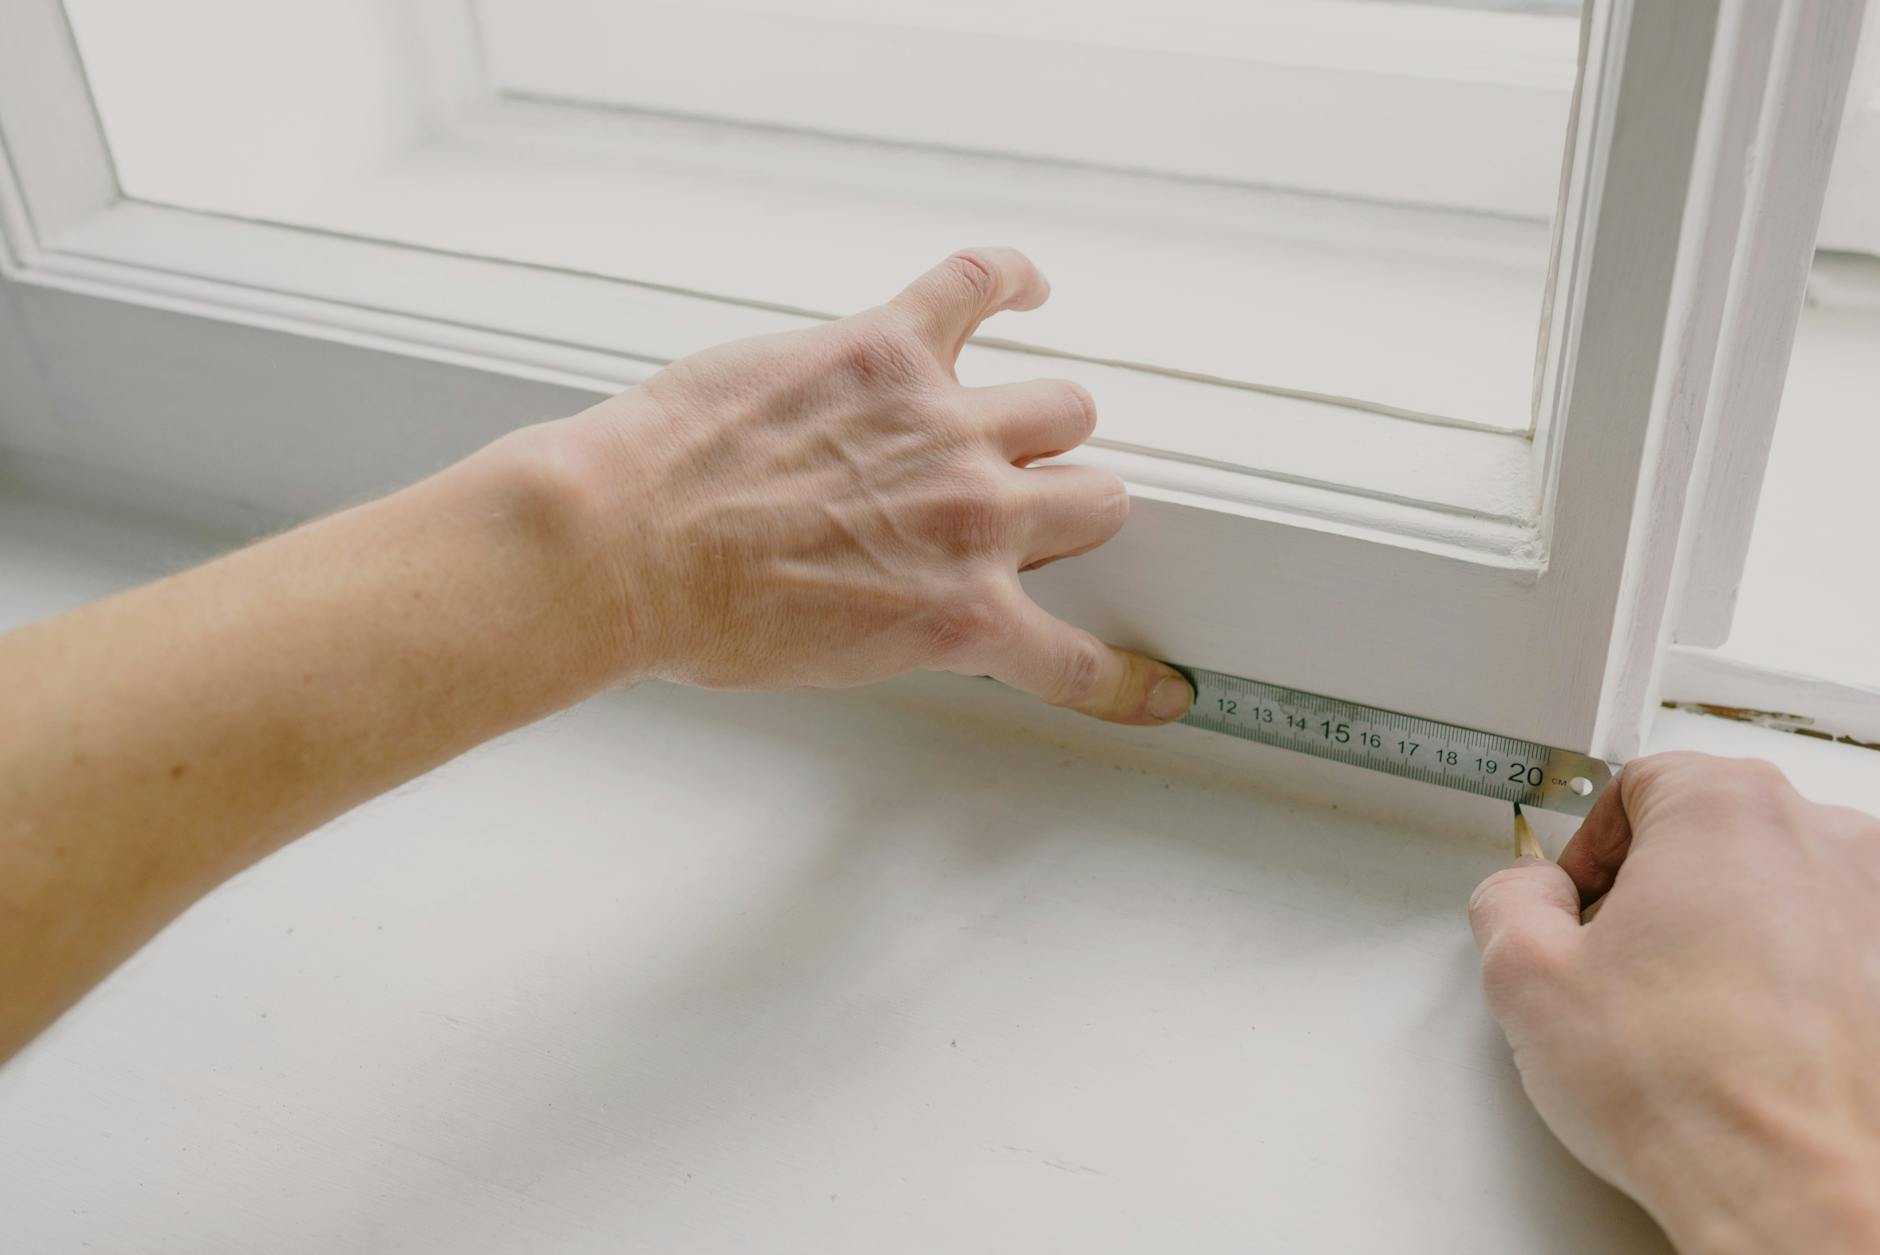
Measuring windows for custom shades sounds simple — grab a tape measure and jot down some numbers, right? In reality, it is one of the most detail-sensitive steps in any window treatment project. A single transposed digit or a forgotten ⅛-inch difference between the top and bottom of a window can result in shades that simply do not work. Before you browse fabric swatches or pick a roller shade style, take the time to understand why precision matters and what can go wrong when it does not happen.
The Cost of Getting It Wrong
Custom shades are manufactured to your exact specifications. Unlike off-the-shelf blinds you grab at a big-box store, there is no “close enough” with custom window treatments. If your measurements are off by even ¼ inch, your shades may not fit inside the window frame, may leave visible gaps along the edges, or may bind against the trim when raised or lowered.
In practical terms, a remeasure and reorder can add 4–6 weeks to your project timeline and cost anywhere from $50 to $200 or more per window depending on the shade style. Across a whole home in Jackson, TN, those errors add up fast.
Why West Tennessee Homes Have Unique Considerations
Homes throughout Jackson, Lexington, Henderson, and Milan often feature a mix of older construction with non-standard window openings and newer builds with modern casement or slider windows. Older homes may have window frames that are out of square — meaning the width at the top differs from the width at the bottom by ⅛ inch or more. Humidity and seasonal temperature swings common in West Tennessee can also cause wood frames to swell or contract slightly, which affects fit over time.
Understanding these local quirks before you order is the difference between shades that look professionally installed and ones that look like an afterthought.
1. Gather the Right Tools Before You Start

Before you take a single measurement, make sure you have the right equipment. Using the wrong tools is one of the most common reasons homeowners end up with shades that do not fit. This section covers exactly what you need — and what to avoid — so your measurements are as accurate as possible from the very first window.
The Only Measuring Tool You Should Use
Always use a rigid steel tape measure — at least 25 feet long so it does not flex mid-span on wider windows. Fabric tape measures used in sewing stretch over time and are not accurate enough for window treatments. A flexible plastic ruler is equally unreliable. Steel tape measures typically cost $10–$25 at any hardware store and are worth every penny.
Avoid using a laser distance measurer as your primary tool. While laser measurers are great for room dimensions, they can reflect off glass at odd angles and give readings that are off by ⅛ to ¼ inch — enough to cause fit problems with inside-mount shades.
Other Supplies You Will Need
Beyond the tape measure, have these items ready before you start:
- Pencil and notepad (or a measuring worksheet) — never rely on memory
- Step stool or ladder for windows above eye level
- Flashlight or phone torch to see into deep window frames
- Level to check whether your sill is truly horizontal
- Camera or phone to photograph each window opening for reference
Label each window clearly — “Master Bedroom Left,” “Kitchen Above Sink,” etc. — so your notes stay organized when you are ready to order or share dimensions with your installer.
2. Understand Inside Mount vs. Outside Mount
Before you measure a single window, you need to decide whether your shades will be inside mounted or outside mounted. This decision changes everything about how you measure — the numbers you record, the dimensions you add or subtract, and even which shade styles are available to you. Understanding the difference now will save you from having to remeasure every window later.
Inside Mount: Clean, Recessed, and Precise
An inside mount means the shade installs inside the window frame, sitting flush within the opening. This look is sleek and modern, shows off your window trim, and works beautifully with cellular shades, roller shades, and Roman shades. However, it demands the most precise measurements because the shade must fit within a defined space without rubbing the sides or leaving large gaps.
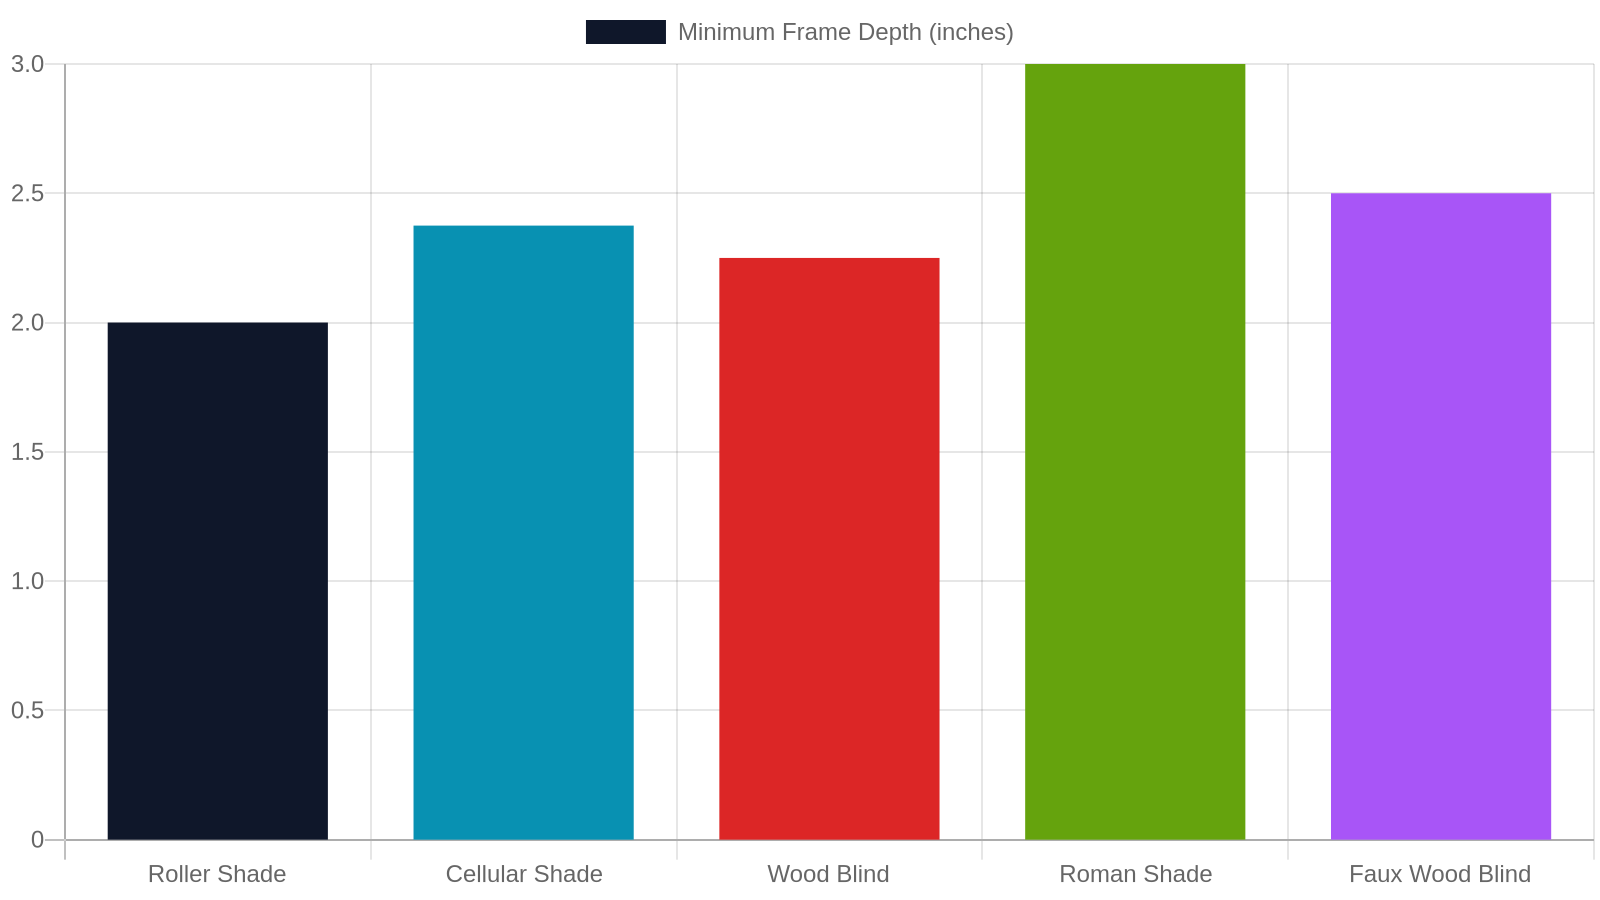
For a proper inside mount, your window frame must have a minimum depth of 2–3 inches (depth varies by shade type). Shallow frames — common in some older Jackson-area homes — may not accommodate certain shade styles at all without a special shallow-mount bracket.
Outside Mount: Flexible, Forgiving, and Light-Blocking
An outside mount means the shade mounts to the wall or trim above the window opening, covering the frame entirely. This approach is more forgiving of irregular openings, makes windows appear larger, and provides better light control because the shade overlaps the frame on all sides.
Outside mounts are ideal for windows with very shallow depth, for rooms where you want to maximize the appearance of window size (a popular choice in smaller Jackson-area bedrooms and bathrooms), or wherever complete light blockout is the priority. The trade-off is that you will see the shade hardware rather than the window trim.
Which Mount Type Is Right for Your Home?
Most homeowners choose inside mount for living areas and primary bedrooms where aesthetics are paramount, and outside mount for bathrooms, media rooms, or any space where light control is the top priority. Some windows — particularly those with very narrow frames or irregular shapes — may only work as outside mounts. When in doubt, a professional measuring consultation will tell you definitively which option works for each window in your home.
3. Measure the Width Correctly for Inside Mounts
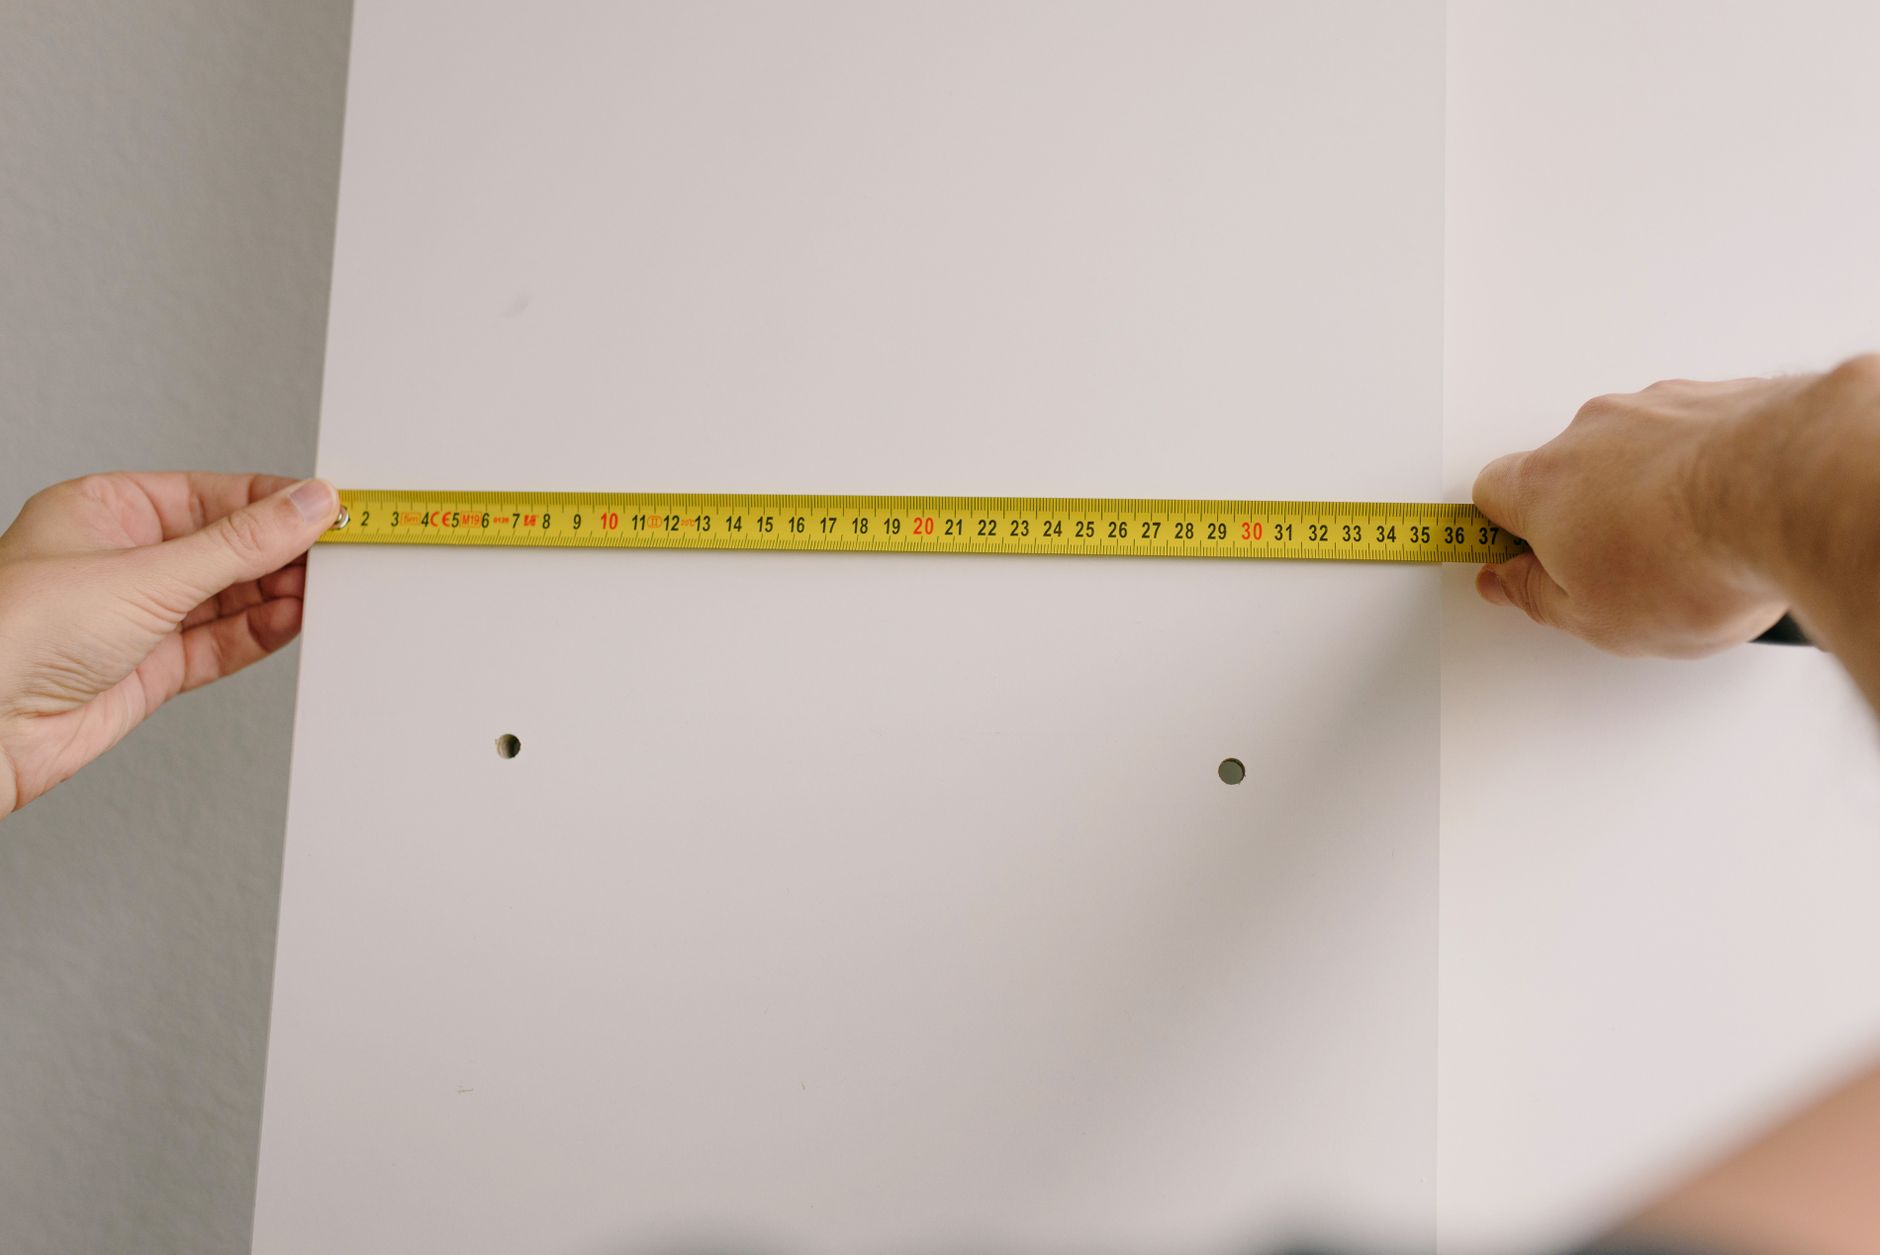
Width is the measurement most homeowners get wrong first. The instinct is to measure once across the middle and call it done. But windows — especially in West Tennessee homes where wood frames expand and contract with humidity — are rarely perfectly uniform from top to bottom. Here is the correct technique for inside-mount width measurements that professional installers use on every job.
The Three-Point Width Rule
Never assume a window is perfectly rectangular. Measure the width at three points: the top of the opening, the middle, and the bottom. Use a steel tape and measure from the inside of the frame on one side to the inside of the frame on the other side at each location. Record all three numbers.
If all three measurements are identical — great. If they differ (which happens frequently in homes built before 1990 and in some newer construction with wood frames), record the smallest of the three measurements. This ensures the shade will fit inside the narrowest point of the opening without binding.
Deductions: What the Manufacturer Does for You
Here is something that surprises many first-time custom shade buyers: most manufacturers automatically deduct ¼ to ½ inch from your inside-mount width measurement to ensure the shade operates freely without rubbing the frame. This is called the “fabrication deduction” and it varies by brand and shade type.
When you order, always confirm whether the manufacturer applies a deduction or expects you to provide the exact finished size. If you are working with a professional installer, they will handle this calculation for you. Never apply your own deduction on top of a manufacturer’s deduction — you will end up with a shade that is too narrow and leaves visible light gaps on both sides.
4. Measure the Height Correctly for Inside Mounts
Height measurements for custom shades require the same three-point discipline as width — but with a few additional considerations that are unique to height. The type of window, the presence of hardware, and whether you have a traditional sill all affect how you record and report your height dimensions. Follow these steps carefully for every window in your home.
The Three-Point Height Rule
Just as with width, measure the height at three points: the left side, the center, and the right side of the window opening. Measure from the top of the inside frame (the top of the opening, not the top of the trim) straight down to the window sill. Again, record all three numbers.
For inside-mount shades, most installers use the largest of the three height measurements. This ensures the shade reaches the sill fully and does not leave a gap at the bottom where light can leak through — particularly important for cellular shades and blackout roller shades used in bedrooms.
Sill vs. Apron: Where Does the Shade End?
The sill is the horizontal ledge at the bottom of the window opening. The apron is the decorative trim piece below the sill. For inside mounts, your height measurement ends at the top of the sill — the shade should just kiss the sill surface when fully lowered, not press hard against it.
If your windows do not have a sill (common in some modern construction), measure to the bottom of the window frame opening. Photograph this area so you can describe it accurately when ordering or consulting with your installer.
Accounting for Window Handles and Cranks
Casement windows and awning windows common in newer Jackson, TN homes often have crank handles or locking levers that protrude into the window opening. Measure from the top of the frame to the top of the handle hardware and note this dimension separately. Your shade must either stop above the hardware or be ordered with a lift system that clears it. Failing to account for hardware is a common and frustrating oversight that can make an otherwise perfectly measured shade completely inoperable.
5. How to Measure for Outside Mount Shades
Outside-mount measurements follow a different logic than inside mounts. Instead of fitting within a space, you are defining a coverage area that extends beyond the window opening. The goal is to block light, cover imperfect frames, and create a polished look — all of which require deliberate additions to your base window dimensions. Here is how to do it right.
Width: Add Overlap on Both Sides
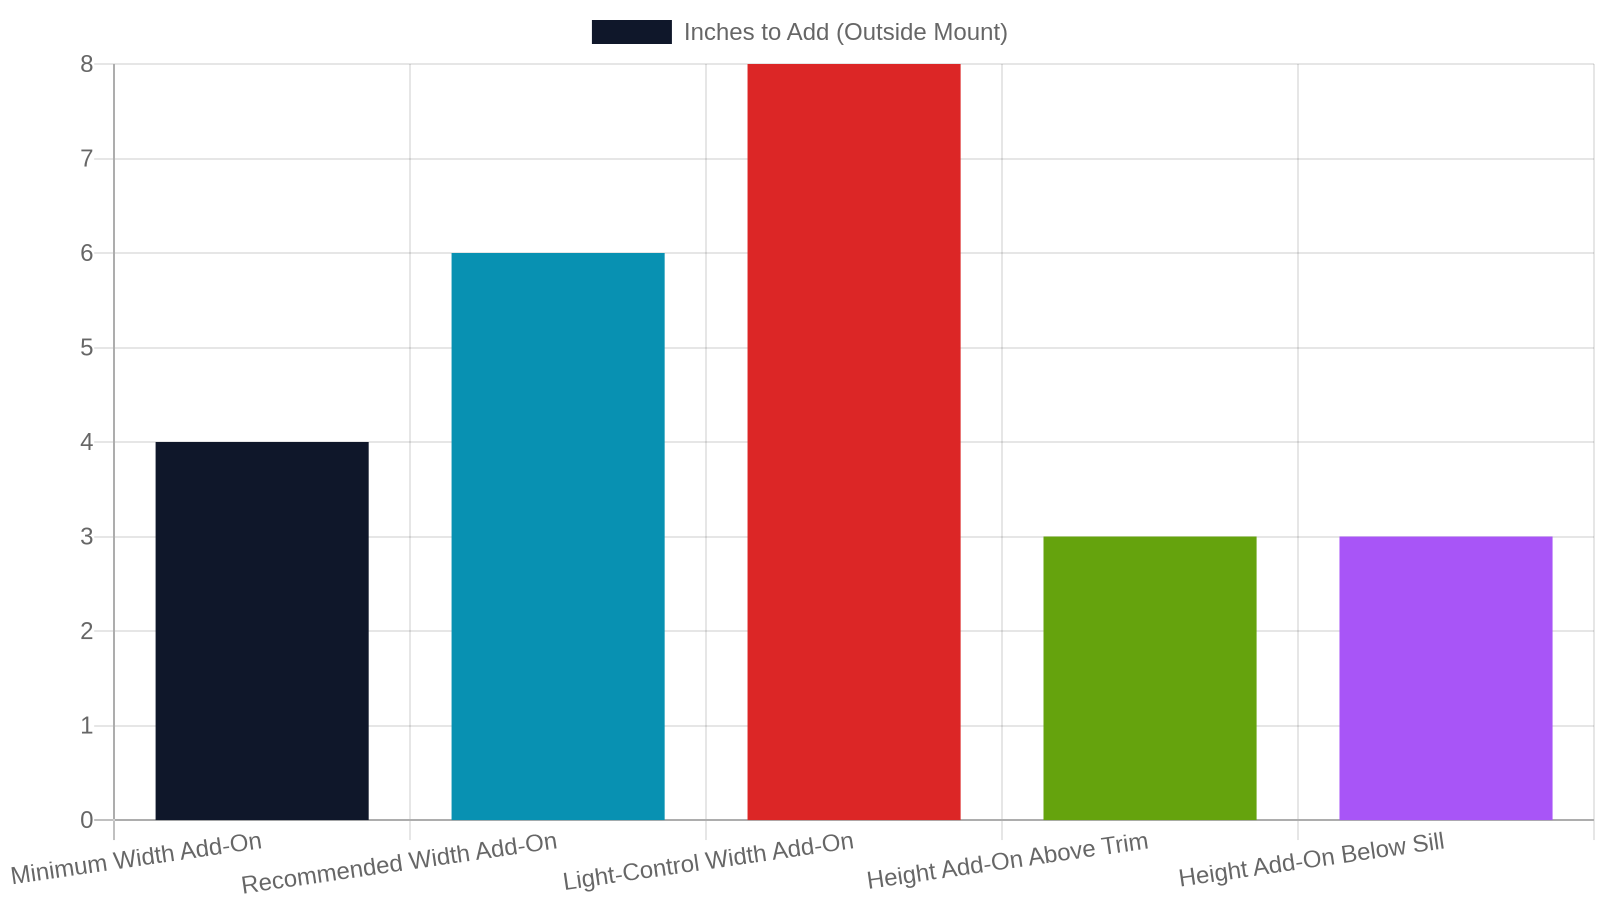
For outside-mount shades, you are measuring the area you want the shade to cover, not the window opening itself. Start by measuring the full width of the window frame (including the trim). Then add at least 2 inches on each side — so a minimum of 4 inches total — to ensure the shade overlaps the frame and blocks light from sneaking around the edges.
For rooms where light control is critical, such as a home theater or a nursery, consider adding 3 inches on each side (6 inches total). Record this final number as your outside-mount width.
Height: Add Clearance Above and Below
For outside-mount height, measure from the point where you plan to mount the bracket (typically 2–4 inches above the window frame or trim) down to where you want the shade to end. Most homeowners mount outside shades 2–3 inches above the top of the trim to hide the headrail and create the illusion of a taller window.
At the bottom, the shade should extend 2–3 inches below the sill for full coverage. Add these extensions to your raw window height to get your outside-mount height dimension. Write it down before moving to the next window.
6. Check for Out-of-Square Windows

One of the most overlooked steps in DIY window measuring is checking whether the window opening is actually square. Many homeowners assume all four corners are 90-degree angles — but in reality, especially in older homes throughout Jackson, Lexington, and Henderson, window frames shift over time. An out-of-square window requires a different approach to measuring and ordering, and catching it early prevents a very frustrating fit problem after your shades arrive.
How to Test for Square
Place a carpenter’s square or a level in each corner of the window opening. If the corner is truly 90 degrees, the square will sit flush against both sides of the frame. If there is a visible gap, your window is out of square. You can also measure the diagonal of the opening from corner to corner in both directions — if both diagonals are equal, the window is square. If they differ by more than ¼ inch, the window is noticeably out of square.
In West Tennessee, out-of-square windows are especially common in homes built before 1980, in pier-and-beam construction, and in any home that has experienced significant foundation settling — which the clay-heavy soils in the Jackson area can cause over time.
What to Do When a Window Is Out of Square
If your window is out of square, inside-mount shades will have a visible gap on one side when fully lowered. You have three options:
- Switch to outside mount — this hides the irregular opening entirely behind the shade.
- Order to the smallest dimension — the shade fits the narrowest point but may show a small gap at the wider end.
- Use a specialty bottom rail — some shade manufacturers offer angled or custom bottom rails that follow an out-of-square sill. Ask your installer about this option.
A professional measurer will identify out-of-square windows immediately and recommend the best solution for each one — another strong reason to schedule a free in-home consultation before ordering.
Inside Mount vs. Outside Mount: Side-by-Side Comparison
Use this table to quickly determine which mount type suits each window in your home before you take a single measurement.
7. Measure Every Window Individually — No Shortcuts
Efficiency feels appealing when you are measuring 10 or 15 windows in a home. The urge to group “matching” windows together and measure only one is understandable — but it is also one of the most reliable ways to end up with at least one shade that does not fit. Professional window treatment installers measure every single opening individually, every time. Here is why that discipline matters and how to stay organized without it becoming overwhelming.
Why 'Same Size' Windows Are Rarely the Same
It is tempting to measure one bedroom window, assume all four windows in the room are identical, and order four shades at the same size. Do not do this. Even windows installed side by side in the same wall can differ by ⅛ to ½ inch due to framing tolerances, trim thickness variations, or minor settling. In a custom shade, that difference is significant.
Always measure each window individually, label each measurement clearly, and keep a separate record for every opening. If you have 14 windows in your home, you should have 14 sets of width and height measurements — each with three data points per dimension.
Organizing Your Measurements Like a Pro
Create a simple room-by-room chart. List each room, then each window within that room (e.g., “Living Room — Window 1 Left of Fireplace,” “Window 2 Right of Fireplace”). For each window record:
- Width: Top / Middle / Bottom (use the smallest for inside mount)
- Height: Left / Center / Right (use the largest for inside mount)
- Frame depth (for inside mount eligibility)
- Mount type: Inside or Outside
- Notes (hardware, obstructions, out-of-square)
Take a photo of each window alongside a sticky note with its label. This system makes ordering — and any follow-up conversations with your installer — fast and error-free.
8. Special Window Types That Require Extra Care
Standard rectangular windows are straightforward once you know the three-point technique. But many homes in the Jackson, TN area — particularly those built in the 1960s through 1990s — feature specialty window configurations that require additional steps and sometimes professional assistance. Here are the most common specialty window types and what to watch for when measuring them.
Bay Windows and Bow Windows
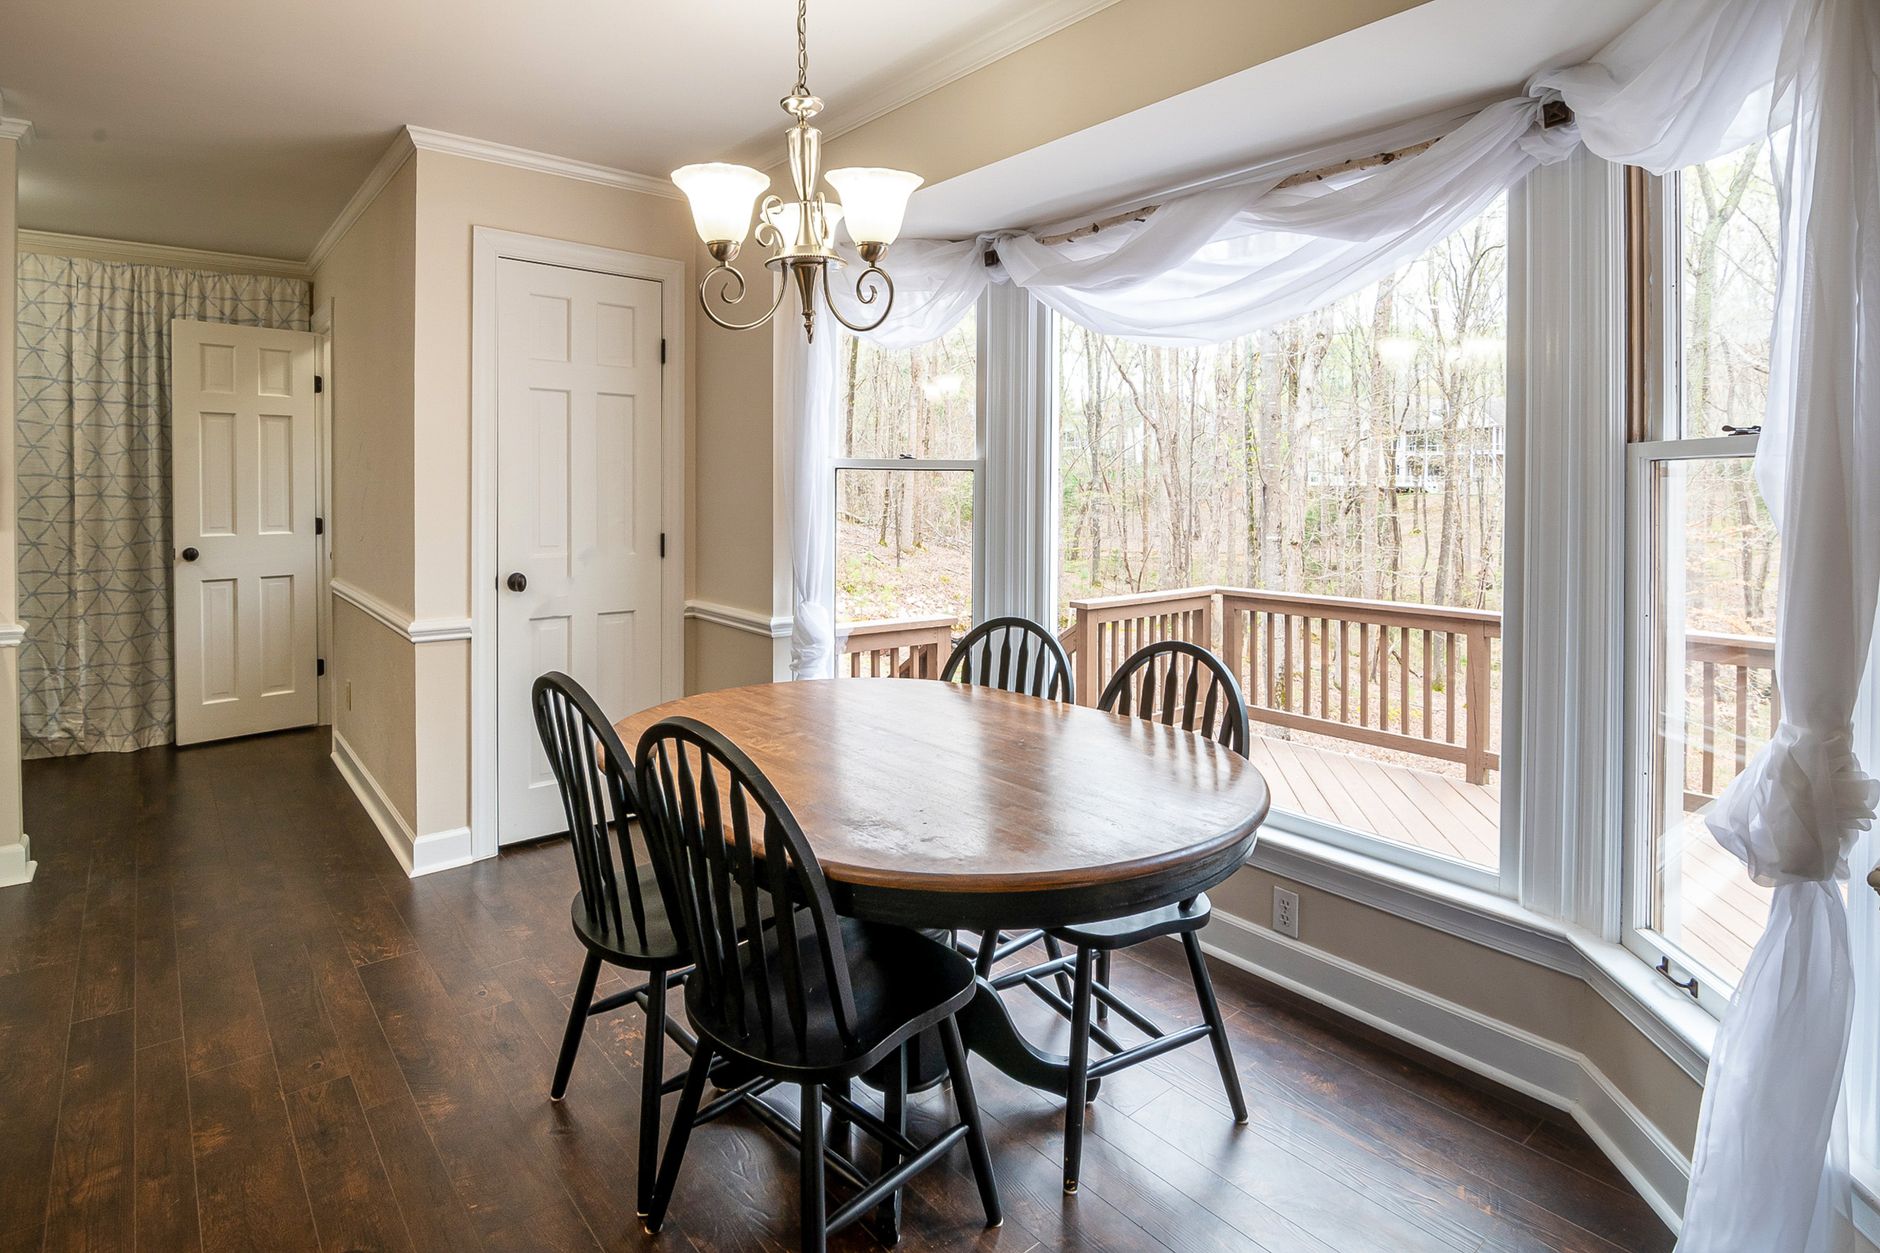
Bay and bow windows consist of multiple angled panels joined together. Each panel must be measured individually as its own window. The center panel is typically the largest and faces straight out; the side panels are angled at 30, 45, or 67.5 degrees depending on the bay style. Shades for angled side panels often require special mounting hardware or may need to be outside-mounted on the wall beside the bay rather than inside each angled frame.
Bay windows are common in older Jackson-area craftsman and Victorian-style homes. If you have a bay window, plan for at least 30 extra minutes of measuring time and consider having a professional handle the measurement — the geometry gets complex quickly.
Sliding Glass Doors and Patio Doors
Sliding glass doors require shades wide enough to cover the full door opening — typically 60 to 96 inches wide. For inside mounts on sliding doors, check the frame depth carefully; many door frames are shallower than standard windows. Vertical blinds, panel track shades, and wide roller shades are the most common solutions. Measure the full glass area width and the full height from the top of the frame to the floor (or to the sill if one exists).
Skylights and Angled Ceilings
Skylight shades are a specialty product and require measurements of the exact glass area rather than the frame opening. Measure the glass width and height at the glass surface itself. Skylight shades must also account for the angle of the roof — most manufacturers need the pitch angle in degrees. These are almost always best left to a professional measurer, as an error means a shade that cannot be installed at all.
9. Double-Check Everything Before You Order

You have measured every window, organized your notes, and you are ready to order. Before you submit anything, run through this final verification checklist. The few minutes it takes to double-check your work is the cheapest insurance policy you can buy against a custom shade that does not fit. Here is what to review before you place your order.
The Measure-Twice Rule — Literally
After recording all your measurements, go back and remeasure every window a second time — ideally on a different day. Compare your two sets of numbers. If any measurement differs by more than ⅛ inch, measure a third time and use the most consistent reading. This simple step catches the majority of transcription errors and tape-reading mistakes before they become expensive problems.
Also double-check your notes for transposed numbers. It is surprisingly easy to write “36 × 48” when you meant “48 × 36” — and ordering a shade with swapped width and height dimensions means a shade that is taller than it is wide when it should be the opposite.
Review Frame Depth One More Time
If you are ordering inside-mount shades, confirm that every window on your list has adequate frame depth. Cellular shades typically need 2⅜ inches minimum; roller shades need 2 inches minimum; Roman shades need 3 inches minimum; wood blinds need 2¼ inches minimum. If any window falls short, switch that window to outside mount before placing your order — not after.
Skip the Stress: Let Blinds Galore Measure for You
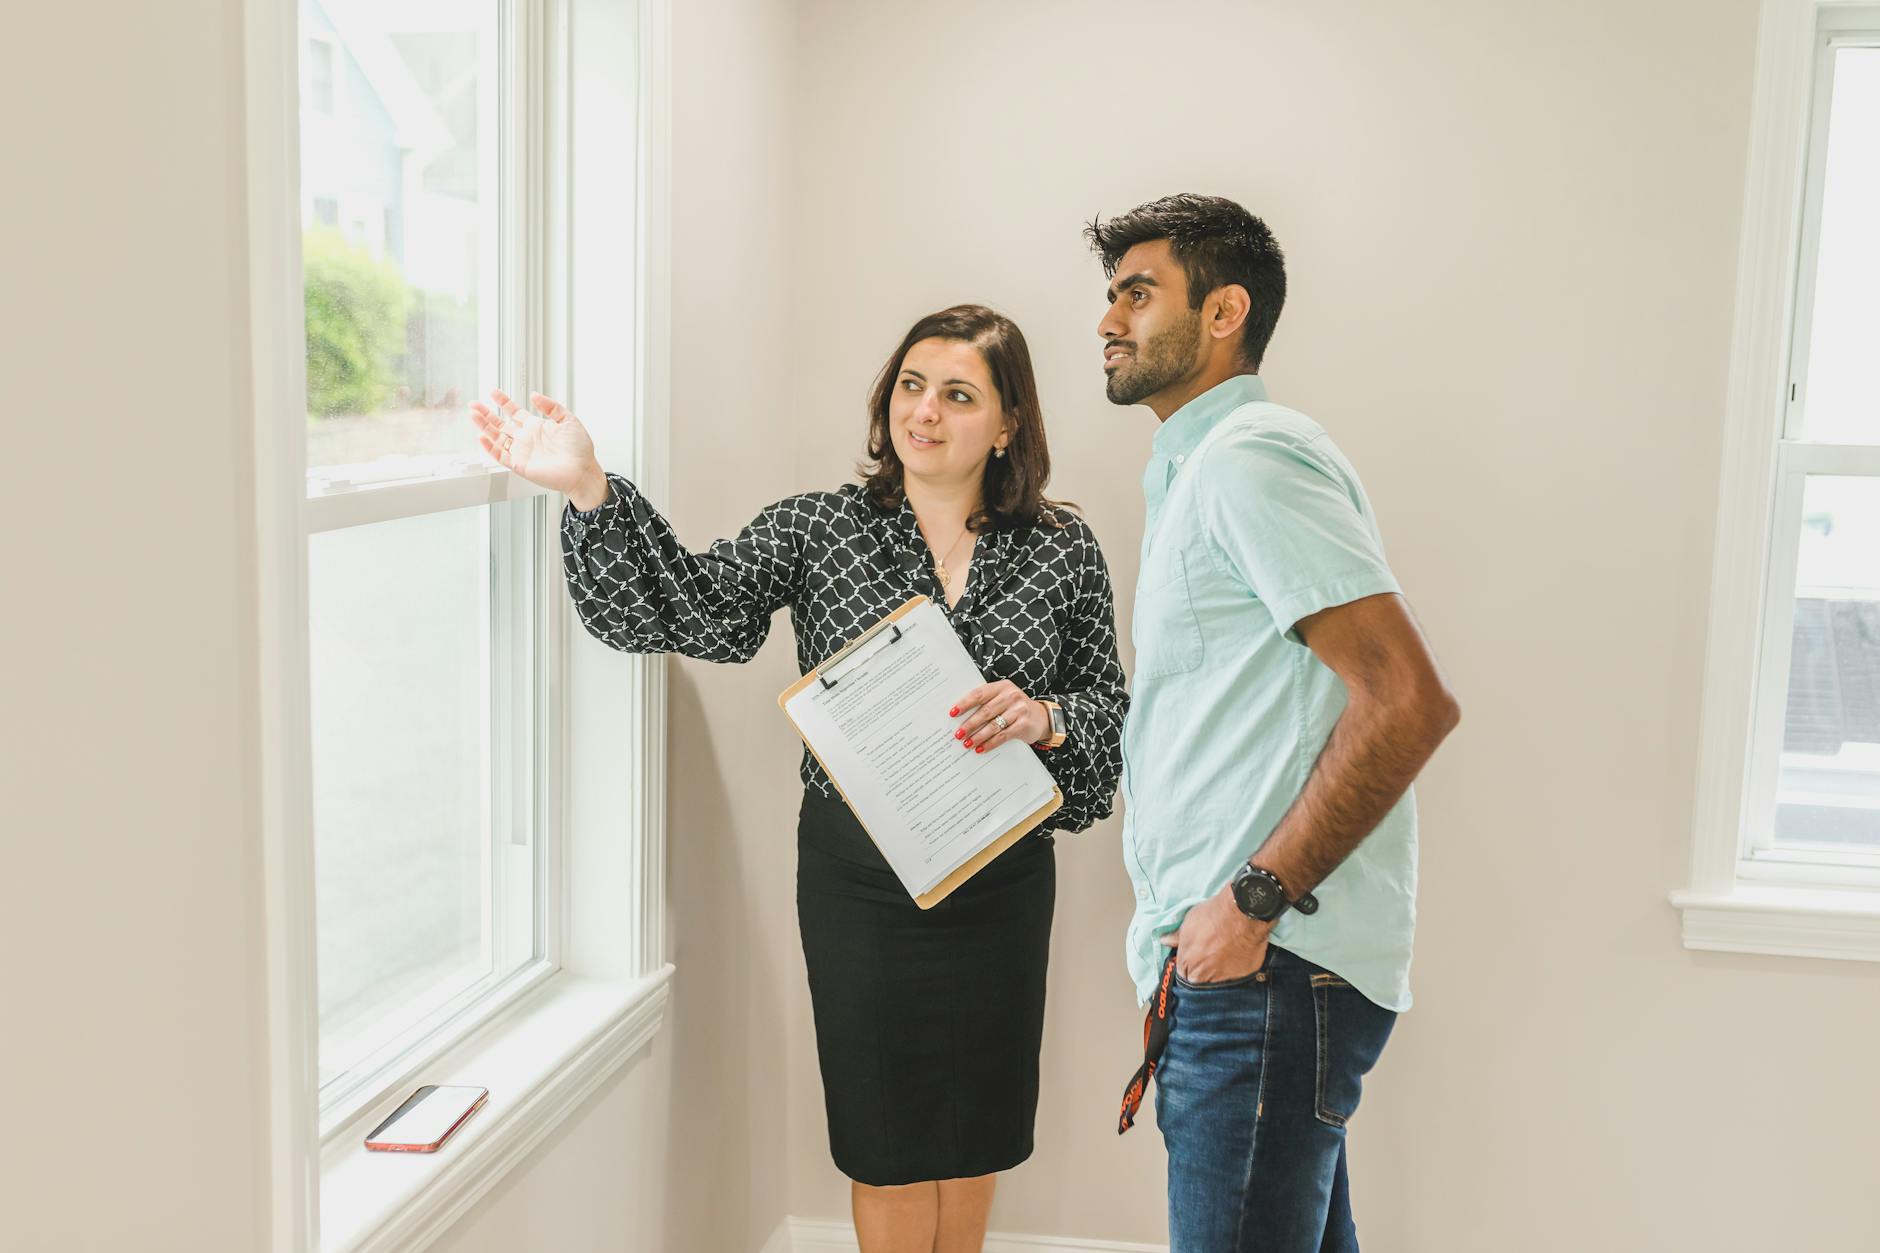
Even with the most careful DIY measuring, there is no substitute for the trained eye of a professional who has measured thousands of windows across West Tennessee. Blinds Galore makes professional measuring completely accessible — and completely free. Here is what you get when you let the experts handle it, and why so many Jackson-area homeowners choose this route even after reading every measuring guide they can find.
What a Free In-Home Consultation Includes
Blinds Galore offers free in-home consultations throughout Jackson, Lexington, Henderson, Milan, and the surrounding West Tennessee communities. When you schedule a visit, a trained professional brings the showroom to your home — fabric samples, style options, and a calibrated measuring kit. Every window in your home gets measured precisely, checked for square, assessed for frame depth, and documented with photos.
You also get personalized recommendations based on your room’s light needs, your décor style, and your budget — not a generic online quiz. The consultation typically takes 60–90 minutes for a full home and costs you absolutely nothing.
The 100% Satisfaction Guarantee
Blinds Galore backs every custom shade installation with a 100% satisfaction guarantee. With over 18 years of experience serving West Tennessee homeowners, the team has measured and installed thousands of windows across the region. If something is not right, it gets made right — period. That peace of mind alone is worth the call.
Ready to get started? Explore our full range of custom shades and see the styles, fabrics, and light-control options available for your Jackson, TN home. Then call (731) 571-5179 to schedule your free in-home measurement — no obligation, no pressure, just expert guidance from your neighbors at Blinds Galore.
Why DIY Measuring and Professional Measuring Are Both Valid
This guide exists because some homeowners genuinely enjoy the DIY process and want to understand exactly what goes into a custom shade order. If you have followed every step carefully, your measurements may well be accurate enough to order with confidence. However, even experienced DIYers often discover at least one window with an unexpected quirk — an out-of-square frame, a shallow depth, or a crank handle that changes the game.
Think of professional measuring not as a replacement for your effort, but as a final quality check backed by 18 years of local experience. If you are also considering plantation shutters for any rooms, professional measuring is especially critical — shutters have the least tolerance for measurement error of any window treatment. And if you want to learn more about the team behind the tape measure, visit our About page to see what sets Blinds Galore apart in West Tennessee.
Frequently Asked Questions
How do I measure a window for custom shades if the frame is out of square?
Measure the width at the top, middle, and bottom and record the smallest number. Measure the height on the left, center, and right and record the largest. Note the difference between your largest and smallest width readings — if it exceeds ¼ inch, consider switching to an outside mount, which hides the irregular opening behind the shade.
Should I measure to the nearest inch or nearest fraction of an inch for custom shades?
Always measure to the nearest ⅛ inch. Custom shades are manufactured to fractional dimensions, and rounding to the nearest whole inch can result in a shade that is noticeably too narrow or too short. Most ordering forms accept measurements in whole inches and fractions such as 32⅜ or 47¾.
How much should I add to window measurements for an outside mount shade?
Add at least 2 inches on each side of the window frame for width (4 inches total minimum) and mount the bracket 2–3 inches above the top of the trim. For rooms where complete light blockout is needed, add 3 inches per side (6 inches total). Extend the shade 2–3 inches below the sill for full coverage.
Can I use a laser measure to measure windows for custom shades?
A laser measure is not recommended as your primary tool for window treatment measurements. Laser beams can reflect off glass at angles and produce readings that are off by ⅛ to ¼ inch — enough to cause fit problems with inside-mount shades. Use a rigid steel tape measure for all custom shade measurements.
Does Blinds Galore offer free measuring in Jackson, TN and nearby areas?
Yes. Blinds Galore provides free in-home consultations and professional measuring throughout Jackson, Lexington, Henderson, Milan, and the greater West Tennessee area. Call (731) 571-5179 to schedule your appointment at no cost and with no obligation.
What is the minimum frame depth needed for inside-mount custom shades?
It depends on the shade type. Roller shades need at least 2 inches of frame depth; cellular shades need 2⅜ inches; faux wood blinds need 2½ inches; wood blinds need 2¼ inches; and Roman shades need at least 3 inches. If your frame is shallower than the minimum for your chosen style, switch to an outside mount.
You might also like
How to Choose the Right Window Treatment Style Using Product Videos
Quick answer: Choosing the right window treatment — blinds, shades, or plantation shutters — comes

7 Best Custom Blinds for Laundry Rooms and Utility Spaces in Jackson, TN
Quick answer: The best custom blinds for laundry rooms and utility spaces in Jackson, TN are moisture-resistant

8 Best Custom Blinds for Kitchens with Large Windows in Jackson, TN
Quick answer: For kitchens with large windows in Jackson, TN, the best custom blinds balance moisture

9 Best Window Treatments for Jackson TN Home Theaters and Media Rooms
Quick answer: For home theaters and media rooms in Jackson, TN, the single best window treatment is a

7 Best Custom Blinds for Sunrooms and Screened Porches in Jackson, TN
Quick answer: The best custom blinds for sunrooms and screened porches in Jackson, TN balance UV protection,

Faux Wood Blinds vs Cellular Shades: Your 9-Point Guide for West Tennessee Sunrooms
Quick answer: For West Tennessee sunrooms and screened porches, faux wood blinds win on moisture resistance,