
How to Clean Plantation Shutters and Keep Them Looking New
You've made a wonderful investment in your home with plantation shutters, and keeping them looking brand new is easier than you might think. It all comes down to a simple routine: a quick weekly dusting and a deeper clean every now and then.
Your Guide to Keeping Plantation Shutters Pristine

Taking care of your plantation shutters isn't just about looks—it's about protecting the value and function they add to your home. A little regular maintenance goes a long way in preventing damage and making sure the shutters we installed with our custom install service operate perfectly for years to come.
Why a Little Cleaning Goes a Long Way
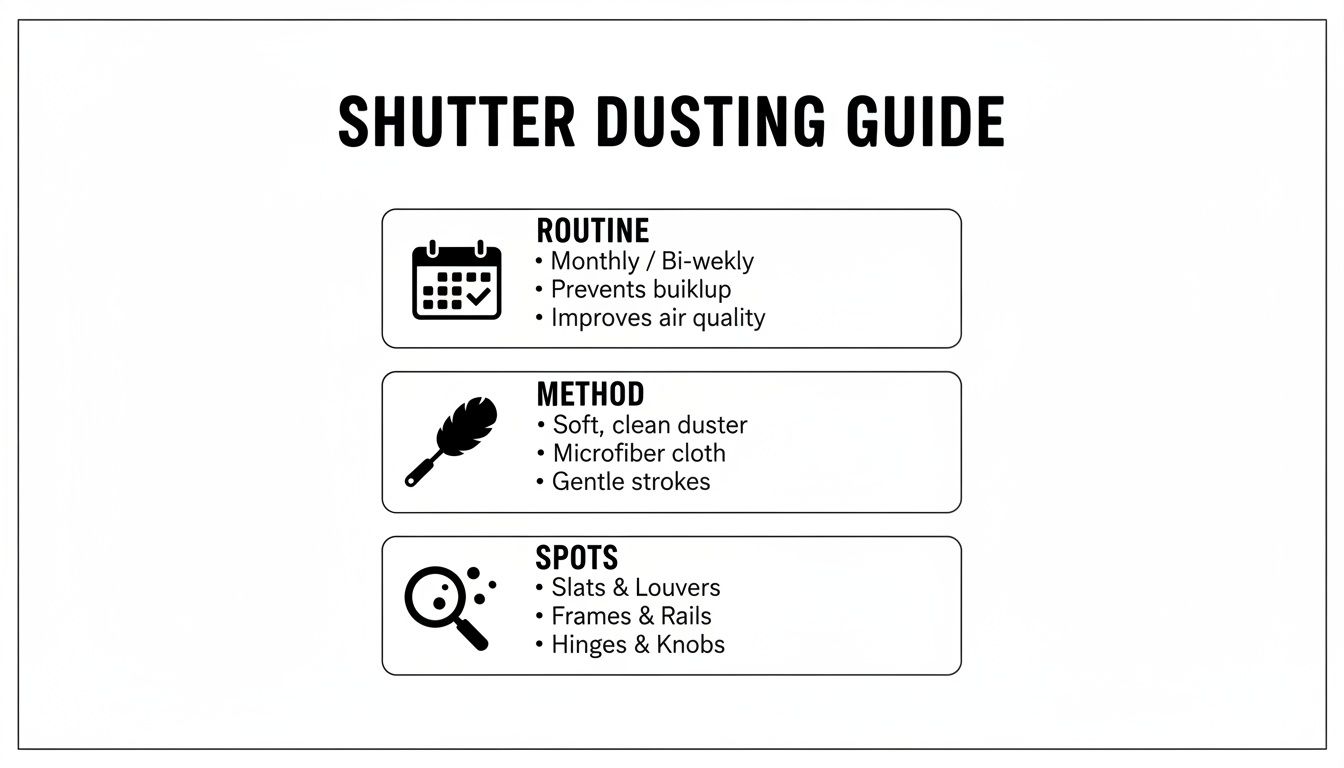
Here in West Tennessee, we know how quickly dust, seasonal pollen, and humidity can build up. Sticking to a consistent cleaning schedule does more than keep your shutters looking sharp; it protects them and even helps improve your home's environment.
- Stop Grime Before It Starts: Regular dusting prevents airborne particles from settling in and becoming a stubborn, sticky mess that's tough to remove.
- Breathe Easier: Wiping away dust and allergens from your shutters means fewer of those irritants are floating around in the air you breathe.
- Protect the Finish: Over time, built-up dirt and grime can act like fine sandpaper, slowly wearing down the beautiful paint or stain on your shutters.
Did you know that a simple cleaning routine can extend the life of your plantation shutters by up to 50%? On top of that, keeping them clean can improve their insulation efficiency by as much as 25%—a huge plus during our hot Tennessee summers. You can see more data on this in the full research report on plantation shutters.
Gathering Your Essential Tools
Before you start cleaning, it pays to have the right supplies on hand. Using the wrong tool or cleaner can lead to scratches, warping, or moisture damage, especially on real wood shutters.
Here’s a quick look at the recommended tools we suggest to our clients. Gathering these items first will make the job faster, safer, and much more effective.
Your Essential Shutter Cleaning Toolkit
Gather these recommended tools to clean your plantation shutters safely and effectively, based on their material.
| Tool | Best For | Pro Tip |
|---|---|---|
| Microfiber Cloth | All shutter types | Its static charge is perfect for grabbing dust without just pushing it around. |
| Soft Brush Attachment | Routine dusting | Use your vacuum's brush on the lowest setting for a super-fast weekly clean. |
| Mild Soap & Water | Faux wood & vinyl | For a deeper clean, mix a few drops of dish soap in a bucket of warm water. |
| Wood-Safe Cleaner | Real wood | Always use a cleaner specifically designed for wood to avoid damaging the finish. |
| Old Toothbrush | Tight spots & corners | Great for gently scrubbing grime out of the small crevices around louvers and frames. |
Having the right kit makes all the difference between a quick touch-up and a frustrating chore.
At Blinds Galore, our 100% satisfaction promise means we’re here for you long after the installation is done. If you ever run into a stubborn spot or have questions about caring for your specific shutters, just give our team a call at (731) 571-5179. We're always happy to help.
Mastering the Routine Dusting and Wiping
If there’s one secret to keeping your custom plantation shutters looking as sharp as the day we finished your custom install, it’s consistent dusting. Think of it as preventative care. A simple weekly once-over stops airborne dust, pollen, and pet dander from building up into a stubborn, grimy film that’s a real pain to remove later.
The best way to tackle it is to start from the top and work your way down—that way, you’re not knocking dust onto surfaces you’ve just cleaned. Close the louvers so they face down, giving you a mostly flat surface. Gently dust each louver, then use the tilt rod to flip them up and hit the other side. This simple two-step motion covers almost every inch.
Choosing Your Dusting Tools
The tool you choose really does matter. A standard dry cotton rag often just pushes dust around, but the right duster will actually trap and remove it. For the best results, we always point our clients to one of these:
- Microfiber Cloth: The fibers in these cloths have a natural static charge that acts like a magnet for dust, pulling particles in instead of just scattering them.
- Lamb’s Wool Duster: These are exceptionally soft and dense, making them perfect for grabbing fine particles without a single worry about scratching your shutter’s finish.
- Soft-Bristle Vacuum Attachment: If you want the fastest clean, your vacuum's soft brush attachment is your best friend. Set it to low suction, and you can quickly clear dust from the louvers, frame, and even the surrounding window sill.
Don't forget to hit the spots everyone else misses. Dust loves to hide on the shutter frame and inside the hinge mechanisms. A quick pass with your duster or vacuum in these areas keeps everything looking fresh and working smoothly.
Pro Tip: For a truly professional-level clean, start with a lamb’s wool duster—they’re known to capture 95% of fine particles that other cloths miss. Then, follow up with a quick blast from a can of compressed air into the hinges. This simple trick can reduce squeaks by 70% and helps prevent premature wear on the hardware.
A Gentle Recipe for Fingerprints and Smudges
Even with regular dusting, fingerprints and small smudges are bound to happen. When they do, a simple and safe cleaning solution is all you need. There's no need for harsh chemicals that can eat away at the finish over time.
Just mix a few drops of mild dish soap into a small bowl of warm water. Lightly dampen a clean microfiber cloth, then wring it out until it’s almost dry. It should never be wet enough to drip. Gently wipe away the smudge, and immediately follow up with a separate, dry microfiber cloth to buff away any moisture.
This gentle method is safe for real wood, faux wood, and vinyl shutters, making it the perfect go-to for quick touch-ups. With this routine, your shutters will stay beautiful for years to come—a commitment to quality that’s at the heart of our 100% satisfaction promise. If you ever have questions, just give us a call at (731) 571-5179.
It’s this kind of lasting quality that has helped the plantation shutter market grow to a value of USD 1,750.50 million in 2024, with wood shutters holding a dominant 45.6% market share. Homeowners truly appreciate a beautiful, durable investment. You can learn more about the growing plantation shutter market and its trends to see why they remain such a popular choice.
Deep Cleaning Techniques for Every Shutter Material
A quick dusting keeps your shutters looking sharp, but let's be honest—every once in a while, they need a little more TLC. To really tackle the grime that builds up over time and keep that finish looking brand new, a deep clean once or twice a year is the way to go.
But here’s the most important thing to know: not all shutters are the same. The secret to a successful deep clean is knowing what your shutters are made of. Using the wrong products or methods can cause warping, discoloration, or worse. Matching your technique to the material is how you’ll keep your shutters looking incredible for years.
Caring for Real Wood Shutters
When it comes to real wood shutters, like the gorgeous Graber and Norman products we install, a gentle hand is non-negotiable. Wood is a natural, porous material, and too much moisture is its enemy. Water can cause the wood to swell, warp, or even ruin a perfect paint or stain finish. The golden rule here is to use as little water as possible.
Never spray cleaners or water directly onto the wood. Instead, here’s a safe and effective way to get them clean:
- Start with a bowl of warm water and add just a few drops of a mild, pH-neutral soap. A gentle dish soap works perfectly.
- Dip a clean microfiber cloth into your solution, then wring it out until it’s almost completely dry. Seriously, it shouldn’t even drip.
- Wipe each louver individually, moving with the grain of the wood.
- Grab a second, completely dry microfiber cloth and immediately buff away any lingering moisture. This final step is crucial.
If you run into a stubborn spot, resist the urge to scrub it aggressively. You can dip a soft-bristle toothbrush into your cleaning solution for tight corners, but always dry the spot thoroughly right after.
One of the biggest mistakes we see people make with wood shutters is using standard furniture polish. Many of these products contain silicone or wax that builds up over time, creating a sticky film that actually attracts more dust and is nearly impossible to remove without damaging the finish.
Cleaning Faux Wood and Composite Shutters
Faux wood and composite shutters are workhorses, built to stand up to the demands of a busy home. Their durability makes them a popular choice, and since they are moisture-resistant, you can clean them a bit more thoroughly than real wood.
While these materials can handle more moisture, you still don't want to soak them. Getting them too wet could, over time, affect the internal hardware or the core material.
For a deep clean, the same mild soap and water solution is your best bet. You can leave your cloth a little damper than you would for real wood, but it should still be well wrung out. After you've wiped down the louvers and frame, go over them once more with a cloth dampened with plain water to rinse away any soap residue before drying everything off.
Deep Cleaning Vinyl Shutters
Vinyl shutters are the undisputed champions of durability. They are 100% waterproof, which is why we so often recommend them for high-humidity areas like kitchens and bathrooms. They can handle grease, soap scum, and a much more robust cleaning routine.
Feel free to use your mild soap and water solution with a sponge or a damp cloth. If you’re dealing with greasy buildup in the kitchen, a simple mixture of one part white vinegar to four parts water will cut right through it.
Before you jump into a deep clean, a good dusting sets you up for success. This quick guide breaks down the essential steps.
As the guide shows, regular dusting using the right tools makes your deep cleaning job so much faster and easier.
No matter what kind of shutters you have, our team is always here to help with expert advice. Our custom install process is just the beginning of our commitment to you—we back it up with a 100% satisfaction promise. If you ever have questions about caring for your shutters, just give us a call at (731) 571-5179.
Removing Tough Stains and Solving Common Problems
Even when you're careful, life happens. A morning coffee splash, a masterpiece from your kid’s crayon collection, or a scuff mark from moving furniture can pop up out of nowhere. A simple dusting won't cut it for these stubborn spots.
The real key is to act fast, but also to act smart. Always start with the gentlest method first—usually just a microfiber cloth with a little mild soap and water. You only want to bring out the bigger guns if that doesn't work. This simple rule is the best way to protect your shutter's finish for the long haul.
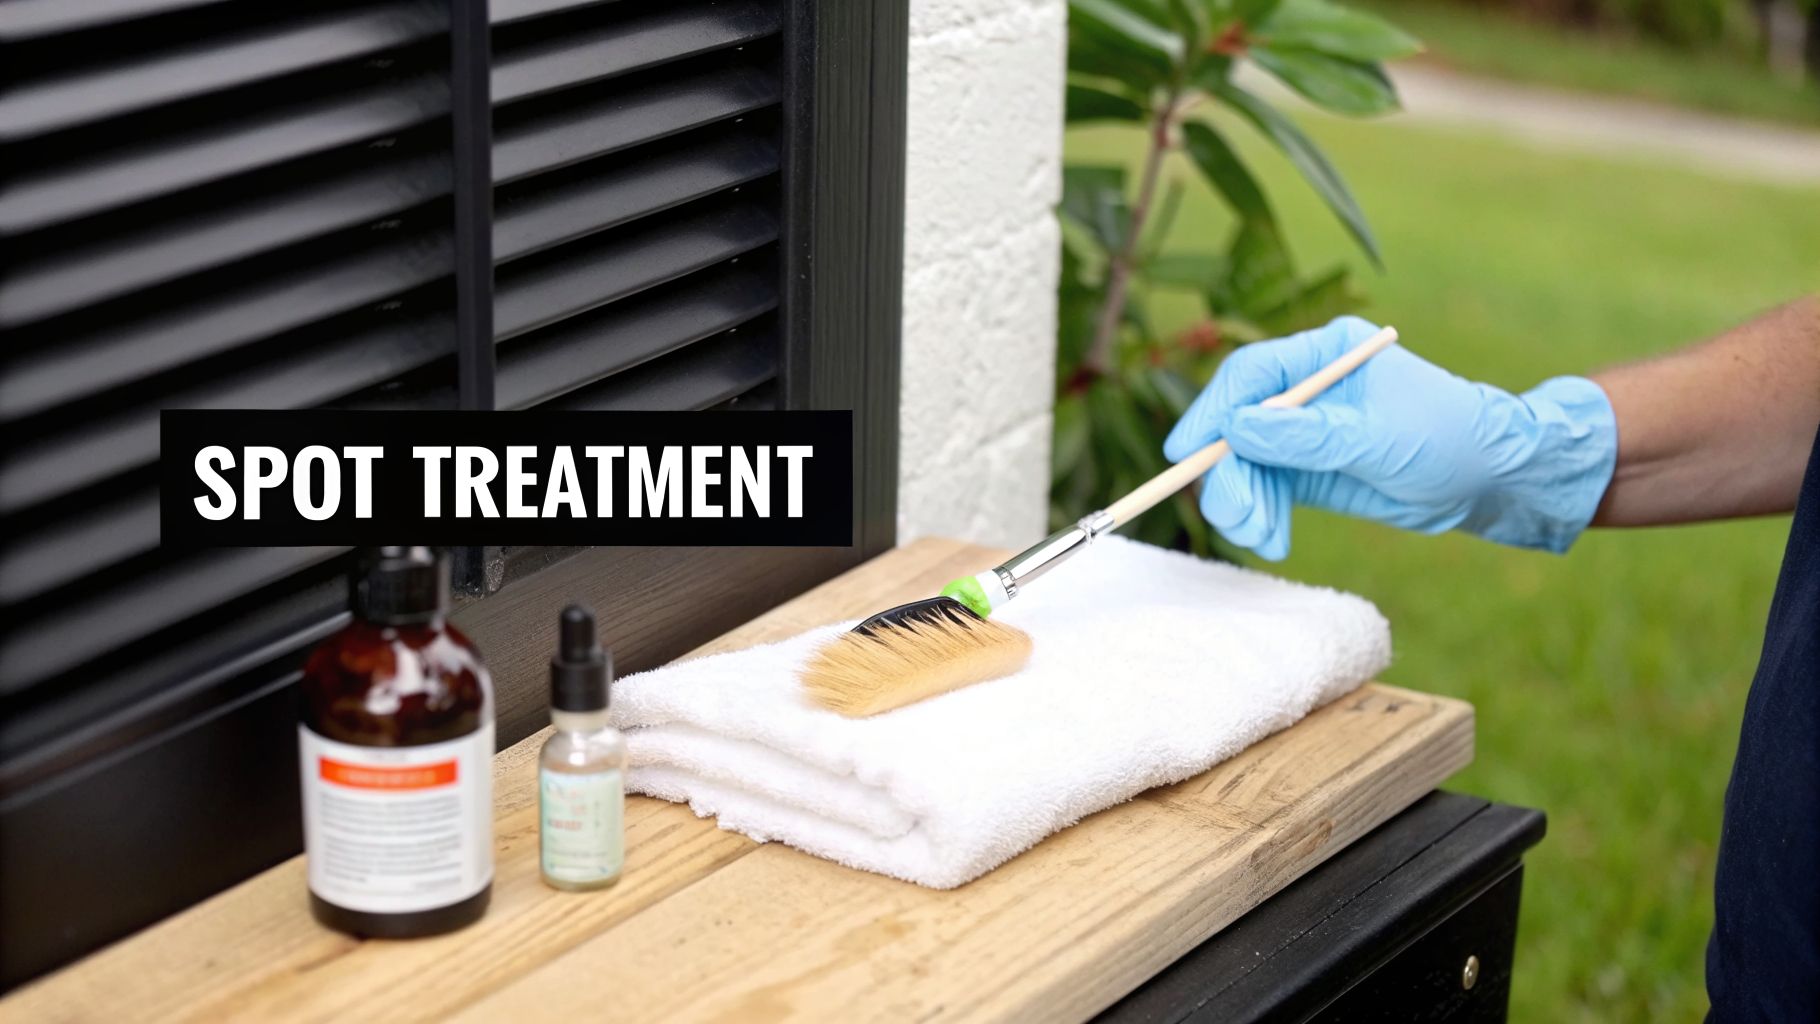
Spot Treating Stains the Right Way
Your approach to a tough spot all comes down to what your shutters are made of. We’ve seen beautiful shutters get permanently damaged because someone used the wrong cleaner, and it’s a heartbreaking—and avoidable—mistake.
- Painted Wood: Got a scuff or a smudge? Try making a simple paste of olive oil and salt. Gently work it into the spot with a soft cloth using a circular motion, then wipe it clean and dry it completely. You’d be surprised how often this works—it can lift over 80% of those common marks without hurting the paint.
- Faux Wood & Vinyl: These materials are tough, so you can be a bit more direct. For an ink mark, dab it lightly with a cotton ball soaked in isopropyl alcohol. If you're dealing with greasy fingerprints, a drop of dish soap right on the spot will usually break it down.
- Water Stains on Wood: If you catch a light water ring on real wood, don't panic. Mix equal parts white vinegar and olive oil. Apply it with a cloth, rubbing gently with the grain of the wood, and then buff it out with a clean, dry cloth.
Believe it or not, a staggering 70% of shutter damage we see comes from using the wrong cleaning products. Getting this right not only preserves your investment but can also help lower your home cooling costs by up to 22% in our hot Tennessee summers. You can see more on how proper care impacts home efficiency from Transparency Market Research.
More Than Just Stains: Common Shutter Hiccups
Sometimes the issue isn't a stain but a mechanical quirk that develops over time. Even after years of perfect performance from a custom install, a louver might get sticky or a hinge might start to squeak. The good news is, most of these are easy fixes.
If your louvers feel stiff, dust is almost always the culprit. Grab your vacuum's soft brush attachment and give the hinges and pivot points a thorough cleaning. If they're still not moving smoothly, a quick puff of dry silicone spray (never an oil-based lubricant like WD-40!) should do the trick.
For a squeaky hinge, before you reach for a lubricant, try a can of compressed air. A quick blast is often all it takes to clear out the tiny bit of dust or debris that's causing all that noise.
In humid spots like a bathroom, mildew can sometimes try to make an appearance on faux wood or vinyl. The perfect weapon is a 50/50 mix of isopropyl alcohol and water in a spray bottle. This solution knocks out 99.9% of germs without leaving behind any residue.
If you’ve tried these tips and are still stuck, don't risk making things worse. Our 100% satisfaction promise means we’re always here to help. Just give us a call at Blinds Galore at (731) 571-5179 for some expert advice.
When to Call a Professional for Shutter Care
We're big fans of a good DIY project, and regular upkeep is the best way to keep your shutters looking brand new. But even the most dedicated homeowner can run into a problem that’s a bit out of their league.
Knowing when to step back and call in a pro is just as important as knowing how to clean. It's about protecting your investment and preventing a small issue from turning into a costly repair.
Sometimes, it’s not even about the difficulty of the job—it's about time. A proper deep clean, especially if you have shutters throughout your home, can easily take up an entire weekend. If you'd rather get your free time back, calling a professional service is a fantastic and convenient option.
Signs It’s Time for an Expert’s Touch
So, how do you know when you’ve hit the limit of a DIY fix? If you run into any of these situations, it’s a clear signal that it's time to get a professional opinion.
Stubborn Stains That Won’t Budge: You’ve tried everything—gentle soap, spot treatments, you name it—but that one mark just refuses to leave. Professionals have access to specialized cleaning agents and techniques that can tackle tough stains without stripping the finish off your shutters.
Mechanical Problems: Are your louvers drooping, misaligned, or refusing to tilt smoothly? If tightening the tension screw doesn’t do the trick, the internal tilt mechanism might be the culprit. Trying to force it is a surefire way to cause a much bigger break.
Warping, Cracks, or Major Damage: This is anything beyond a minor scuff. We’re talking about wood louvers that have warped from moisture, deep scratches that have broken through the paint, or shutters that no longer hang or close properly. These problems often require professional refinishing or replacement parts.
Handing over a complex job to a seasoned professional is a core part of our 100% satisfaction commitment. We believe you should be completely happy with your shutters, and that includes getting them the right care when they need it most.
The Benefits of Professional Service
When you choose a professional service from Blinds Galore, you’re getting more than just a deep clean. Our experienced team can handle expert repairs, replace damaged components, and even apply a deep conditioning treatment for real wood shutters. This restores their natural beauty and helps protect them from the Tennessee climate.
Don’t risk causing permanent damage to your beautiful shutters. If the job feels bigger than a simple wipe-down, we’re here to help.
For a free in-home consultation or to talk about professional shutter care in the Jackson, TN area, just give the Blinds Galore team a call at (731) 571-5179. We’ll make sure your custom install investment looks incredible for years to come.
Frequently Asked Questions About Shutter Cleaning
After thousands of custom install projects, our team has heard just about every question there is when it comes to keeping plantation shutters looking their best. We've pulled together some of the most common ones to give you the expert advice you need.
How Often Should I Deep Clean My Plantation Shutters?
For most homes, a really good, thorough cleaning once or twice a year is all you need. The real key, however, is to pay attention to where the shutters are located.
Shutters in your kitchen, for instance, are constantly battling grease and steam. The ones in your bathroom are dealing with high humidity. For these tougher environments, we recommend a cleaning every 3-4 months. The most important thing you can do, though, is stick to a quick weekly dusting. It makes those deep cleans go so much faster.
Is It Safe to Use Furniture Polish on My Wood Shutters?
We get this one a lot, and our answer is almost always a firm "no." We strongly recommend steering clear of most commercial furniture polishes, especially any that contain silicone or wax. Over time, these create a sticky buildup that actually attracts more dust and can be a nightmare to remove without damaging the shutter's finish.
All you really need is a clean microfiber cloth dampened with a little water. If you need something stronger, a cleaner made specifically for wood surfaces is the way to go. If you’re looking for that extra shine and layer of protection, a quality wood conditioner is a far safer bet than furniture polish.
What Is the Biggest Mistake People Make When Cleaning Shutters?
Hands down, the most common and damaging mistake we see is using too much water, especially on real wood shutters. Wood is a naturally porous material, and soaking it can cause it to swell, warp, or crack. That kind of damage can easily ruin the finish and the shutter itself.
Always wring out your cleaning cloth until it’s just barely damp. Even though faux wood and vinyl shutters are more water-resistant, you should still avoid drenching them. Excess water can find its way into the internal hardware and cause rust or other mechanical issues down the road.
Can I Use Abrasive Sponges on Tough Spots?
Please don't! Never use anything abrasive like a magic eraser, scouring pad, or steel wool on your plantation shutters. These will create thousands of tiny scratches that will permanently dull the finish. In some cases, they can even strip the paint or vinyl coating right off.
Your best bet is to always start with the gentlest method. A soft cloth with a bit of mild soap and water is usually enough to handle most spots. Only if that doesn't work should you move on to a slightly stronger spot treatment designed for that specific material.
Our 100% satisfaction commitment means we're here to help you protect your investment long after the installation. If you hit a snag you can't figure out, just give the Blinds Galore team a call for expert advice at (731) 571-5179.
Are your window treatments ready for a professional touch-up or a complete refresh? At Blinds Galore, we offer everything from expert guidance to a full selection of beautiful new custom blinds, shades, and shutters. Visit us online to explore our options and schedule your free in-home consultation today.
You might also like

Best Plantation Shutter Brands – 2026 Review
If you're looking at your windows right now and thinking the room needs more polish, better privacy,
What Are Plantation Shutters Made Of
You're probably looking at a window right now thinking the same thing a lot of West Tennessee homeowners

Contemporary Roman Shades: Modern Styles for Your Home
You know the feeling. Your old blinds work, but they don't do your room any favors. They look hard,

Sliding Glass Window Treatments for Your West TN Home
That sliding glass door probably does two jobs at once in your home. It opens your living space to the

Vertical Blinds vs Horizontal Blinds: The Definitive Homeowner’s Guide
When you're trying to decide between vertical and horizontal blinds, it really comes down to your

Cordless Blinds vs Corded Blinds A Modern Homeowner’s Guide
When you're weighing the pros and cons of cordless blinds vs corded blinds, the verdict for today's